
Transport your taste buds to the tropics with this Pineapple Coconut Mousse Cake. This effortless, no-bake dessert combines the sunny sweetness of pineapple with creamy coconut and a hint of vanilla for a truly refreshing treat. In just 15 minutes, you can assemble a professional-style loaf cake featuring a light vanilla sponge base, a velvety coconut-infused mousse, and a vibrant golden pineapple glaze.
Why You’ll Love This Tropical Delight
- Refreshing Flavor Profile: The tropical combination of pineapple and coconut creates a bright, breezy flavor that isn’t overly heavy.
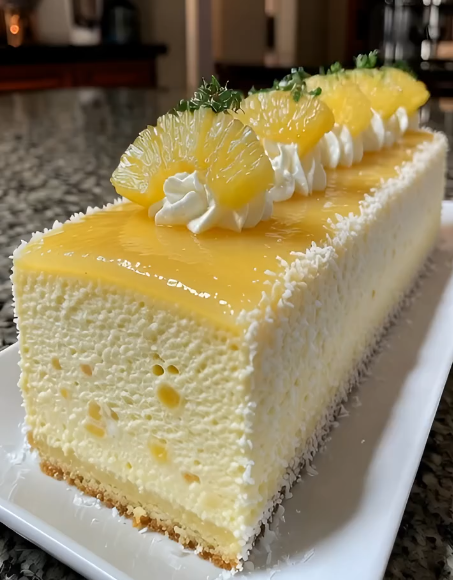
- Beautiful Presentation: Topped with fresh pineapple fans and snowy coconut flakes on the sides, it’s a centerpiece-worthy dessert made in a fraction of the usual time.
- Perfectly Balanced Textures: Features a soft vanilla sponge base, a cloud-like mousse, and a silky-smooth glaze for a gourmet mouthfeel.
Ingredients
- 1 thin layer of vanilla sponge cake (for the base)
- Filling:
- 1 cup heavy whipping cream, chilled
- ½ cup coconut cream or cream cheese, softened
- ¼ cup powdered sugar
- 1 tsp vanilla extract
- Topping & Coating:
- ½ cup pineapple jam or strained pineapple purée (for the glaze)
- ½ cup shredded coconut (for the sides)
- Whipped cream (for rosettes)
- Fresh pineapple slices
- Fresh mint (for garnish)
Step-by-Step Instructions
- Prepare the Base: Line a small loaf pan with parchment paper. Place a rectangular slice of vanilla sponge at the bottom to act as your sturdy base.
- The Coconut-Vanilla Mousse: In a bowl, whisk together the coconut cream (or cream cheese), powdered sugar, and vanilla extract until smooth. In a separate chilled bowl, whip the heavy cream to stiff peaks, then gently fold it into the coconut mixture until light and airy.
- Fill and Smooth: Pour the mousse mixture over the vanilla sponge base. Use an offset spatula to smooth the top into a perfectly level surface.
- Quick Set: Place the cake in the freezer for about 10 minutes. This allows the mousse to firm up enough to support the glaze without mixing.
- The Golden Glaze: Spread a thin, even layer of the pineapple glaze over the top of the chilled mousse.
- Texture the Sides: Lift the cake from the pan using the parchment paper edges. Gently press shredded coconut into the sides of the mousse until fully coated.
- Final Flourish: Pipe elegant whipped cream rosettes down the center. Top each rosette with a fan-shaped pineapple slice and a small sprig of fresh mint.
Pro-Tips for a Flawless Result
- Clear Glaze: For a professional look, strain your pineapple purée through a fine-mesh sieve to remove any pulp, ensuring a high-shine, translucent finish.
- Chilled Tools: Whip your cream in a pre-chilled metal bowl to help it reach stiff peaks faster and keep the mousse stable.
- Clean Slices: To see the beautiful, distinct layers of sponge and mousse, use a hot, dry knife to slice the cake, wiping it clean between every cut.