
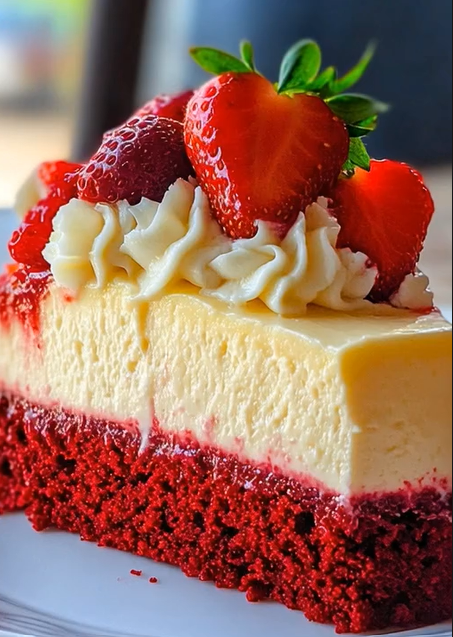
Indulge in the striking contrast of this Red Velvet Cheesecake, a “scroll-stopping” dessert that combines a vibrant, cocoa-infused base with a silky-smooth cheesecake layer. Crowned with elegant whipped cream swirls and fresh, glistening strawberries, this treat offers a professional, high-fidelity finish that is as beautiful as it is delicious.
Why You’ll Love This Decadent Duo
- Textural Masterpiece: The dense, velvety crumb of the red velvet cake provides a perfect foundation for the light, creamy cheesecake topping.
- Vibrant Aesthetic: The deep crimson hue of the base paired with the stark white cheesecake and bright red strawberries creates a stunning “zero AI vibe” visual.
- Balanced Flavors: Subtle cocoa notes in the red velvet layer perfectly complement the tangy richness of the cream cheese filling.
Ingredients 🛒
- Red Velvet Base:
- 1 ½ cups all-purpose flour
- ¾ cup granulated sugar
- 1 tsp cocoa powder
- ½ cup buttermilk
- 1 large egg
- Red food coloring (gel preferred for intensity)
- Cheesecake Layer:
- 16 oz cream cheese, softened
- ½ cup granulated sugar
- 2 large eggs
- 1 tsp vanilla extract
- The Garnish:
- Whipped cream rosettes
- Fresh strawberries, halved
Step-by-Step Instructions 👩🍳
- Bake the Base: Prepare your red velvet cake batter and pour it into a lined pan. Bake at 350°F (175°C) for 15–20 minutes until just set. Let it cool slightly.
- Cream the Filling: Beat softened cream cheese and sugar until smooth. Add eggs one at a time, followed by vanilla, mixing on low speed to keep the texture professional and bubble-free.
- Layer & Bake: Pour the cheesecake batter directly over the red velvet base. Bake at 325°F (160°C) for 35–40 minutes until the edges are firm but the center has a slight jiggle.
- Slow Cool: Turn off the oven and let the cheesecake sit inside with the door cracked for 30 minutes. This prevents cracking and ensures a high-fidelity, smooth surface.
- Chill: Refrigerate for at least 4 hours or overnight to allow the layers to fully set and the flavors to meld.
- Decorate: Just before serving, pipe generous whipped cream rosettes around the border and top with fresh, vibrant strawberry halves.
Pro-Tips for Success
- Prevent Bleeding: Ensure your red velvet base is cooled before adding the cheesecake batter to keep the layers distinct and sharp.
- Berry Shine: For a professional look, brush your strawberries with a little warmed apricot jam or simple syrup to give them a “storybook realism” glow.
- Perfect Slices: Use a warm, wet knife to cut through the layers, wiping it clean between every slice to showcase the beautiful red and white stratification.